Built by Runlayer. Runlayer builds and maintains this connector. It runs
on Runlayer Deploy, which must be enabled for your workspace.
Available Tools
| Tool | Description |
|---|---|
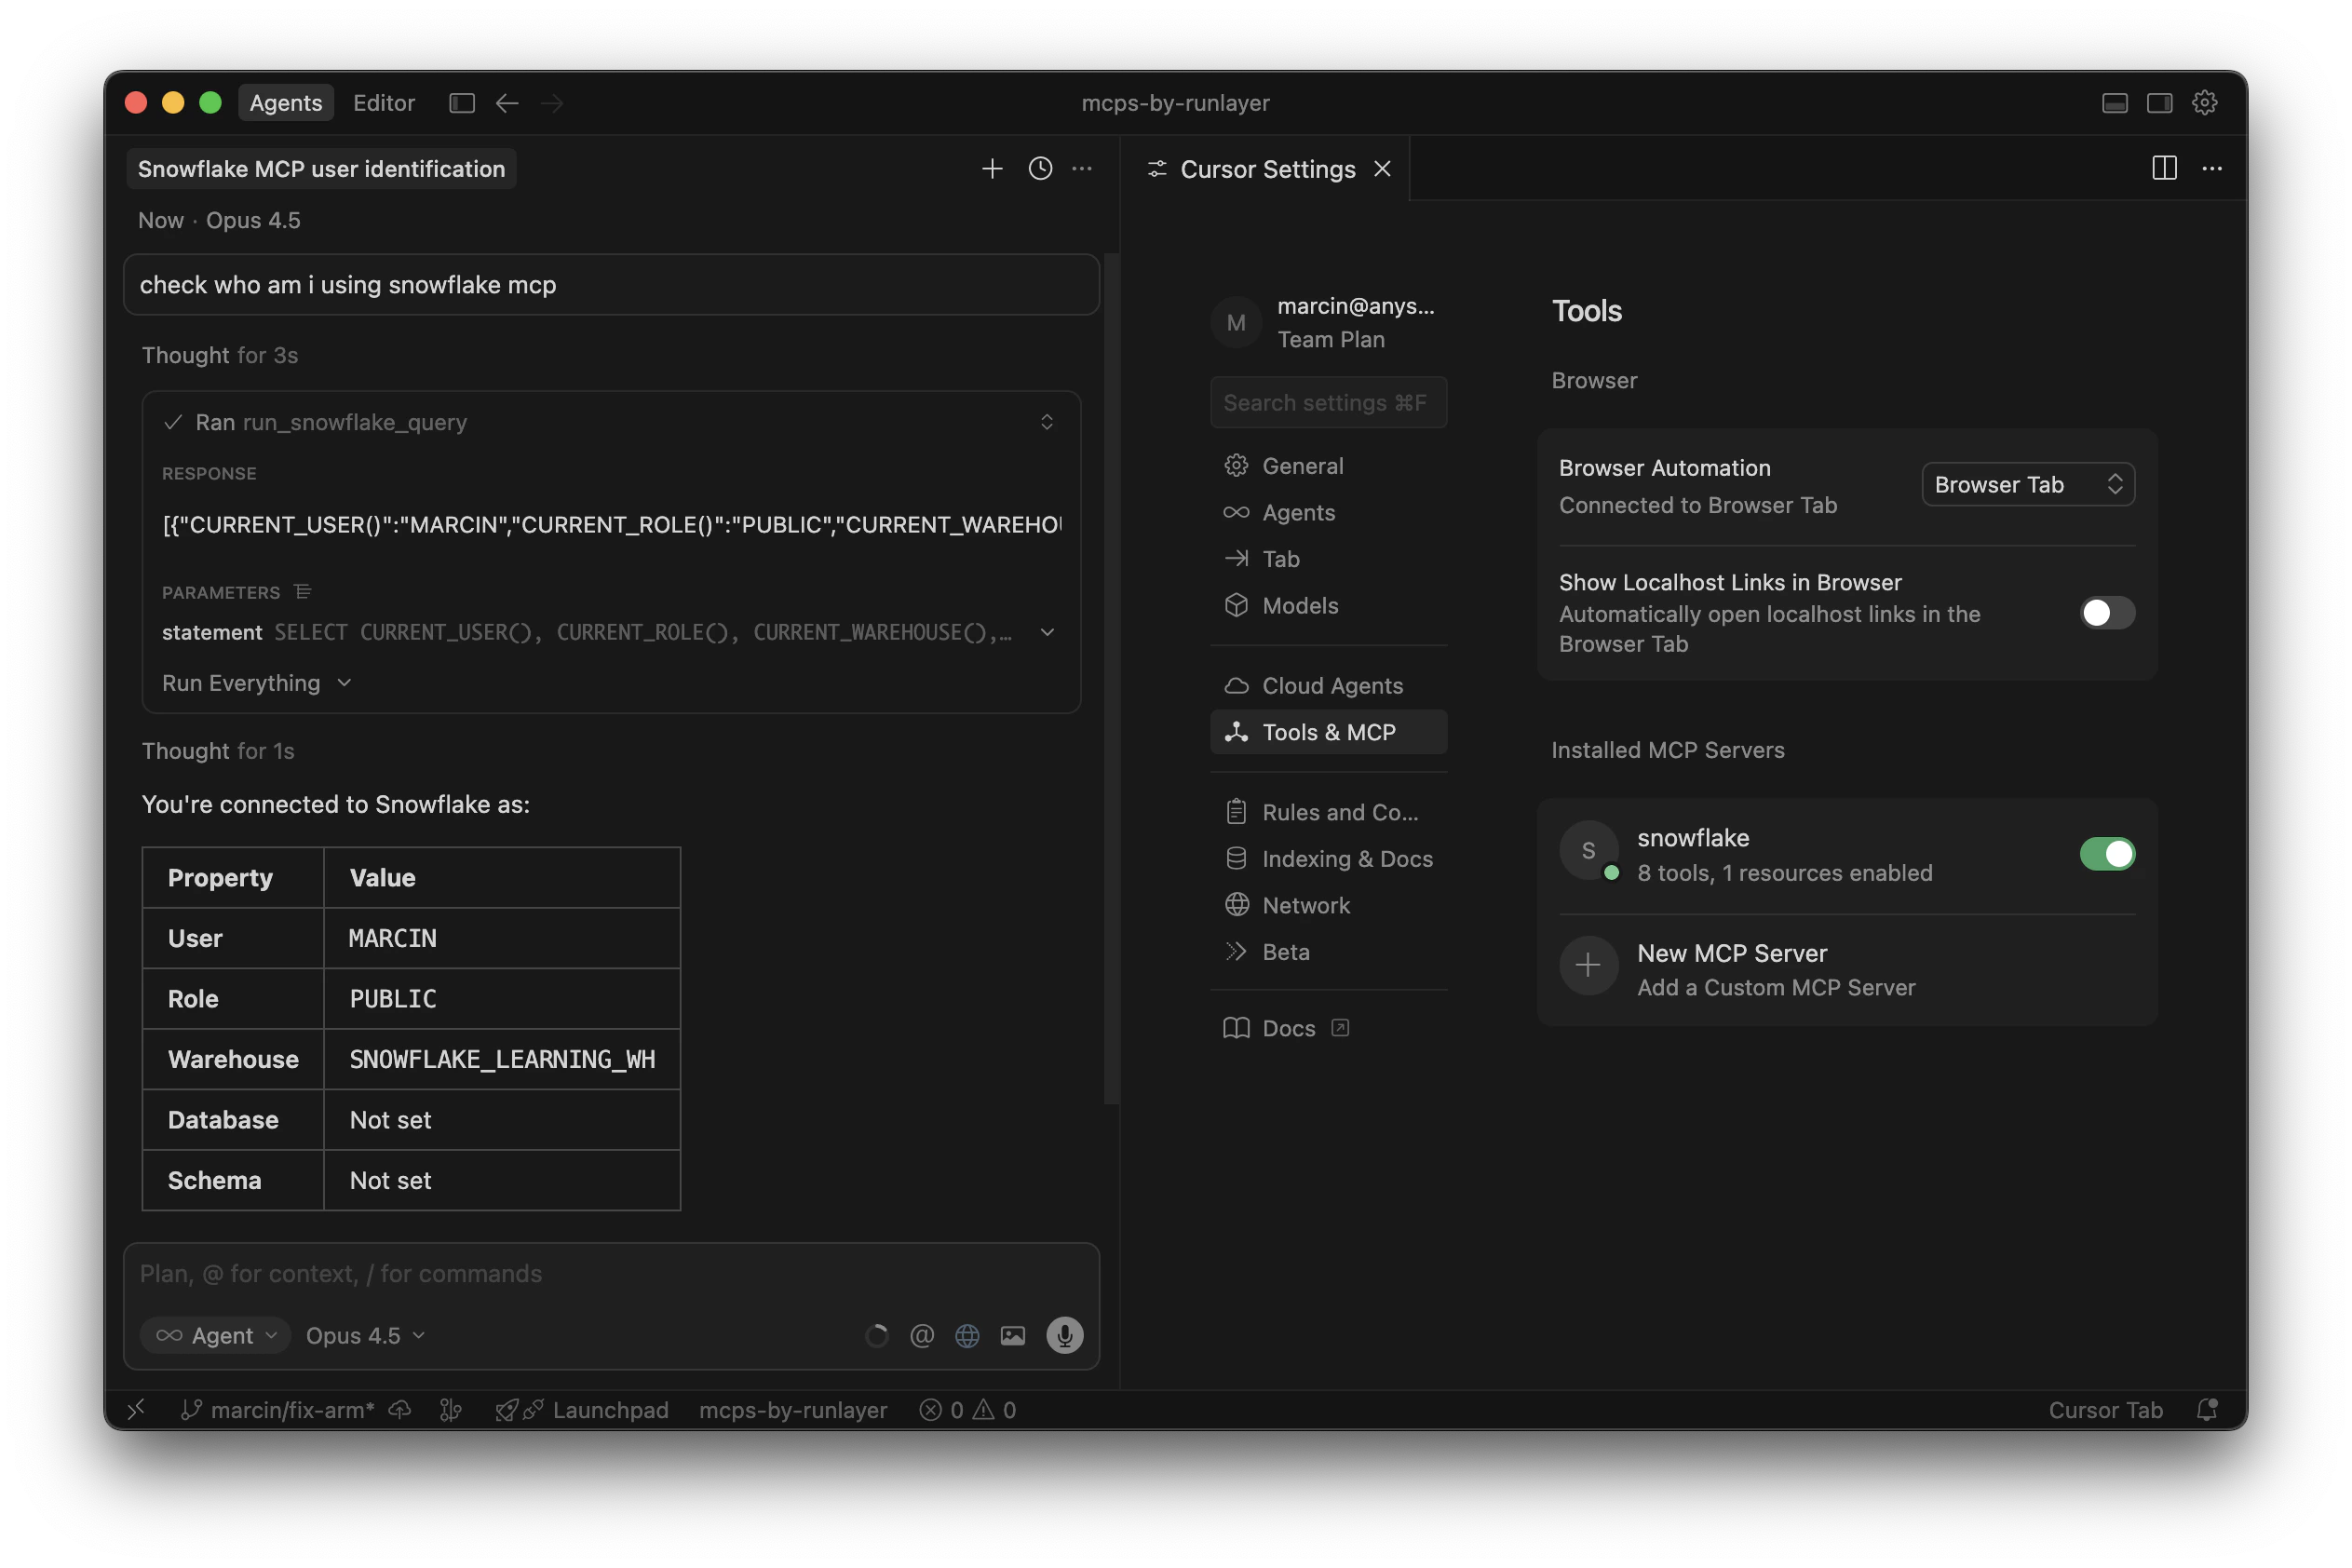
read_query | Execute read-only SQL queries against the warehouse |
list_databases | List all accessible databases |
list_schemas | List schemas in a database |
list_tables | List tables in a schema |
describe_table | Get column details for a table |
Setup
Create Security Integration
Run the following SQL in your Snowflake console. Replace 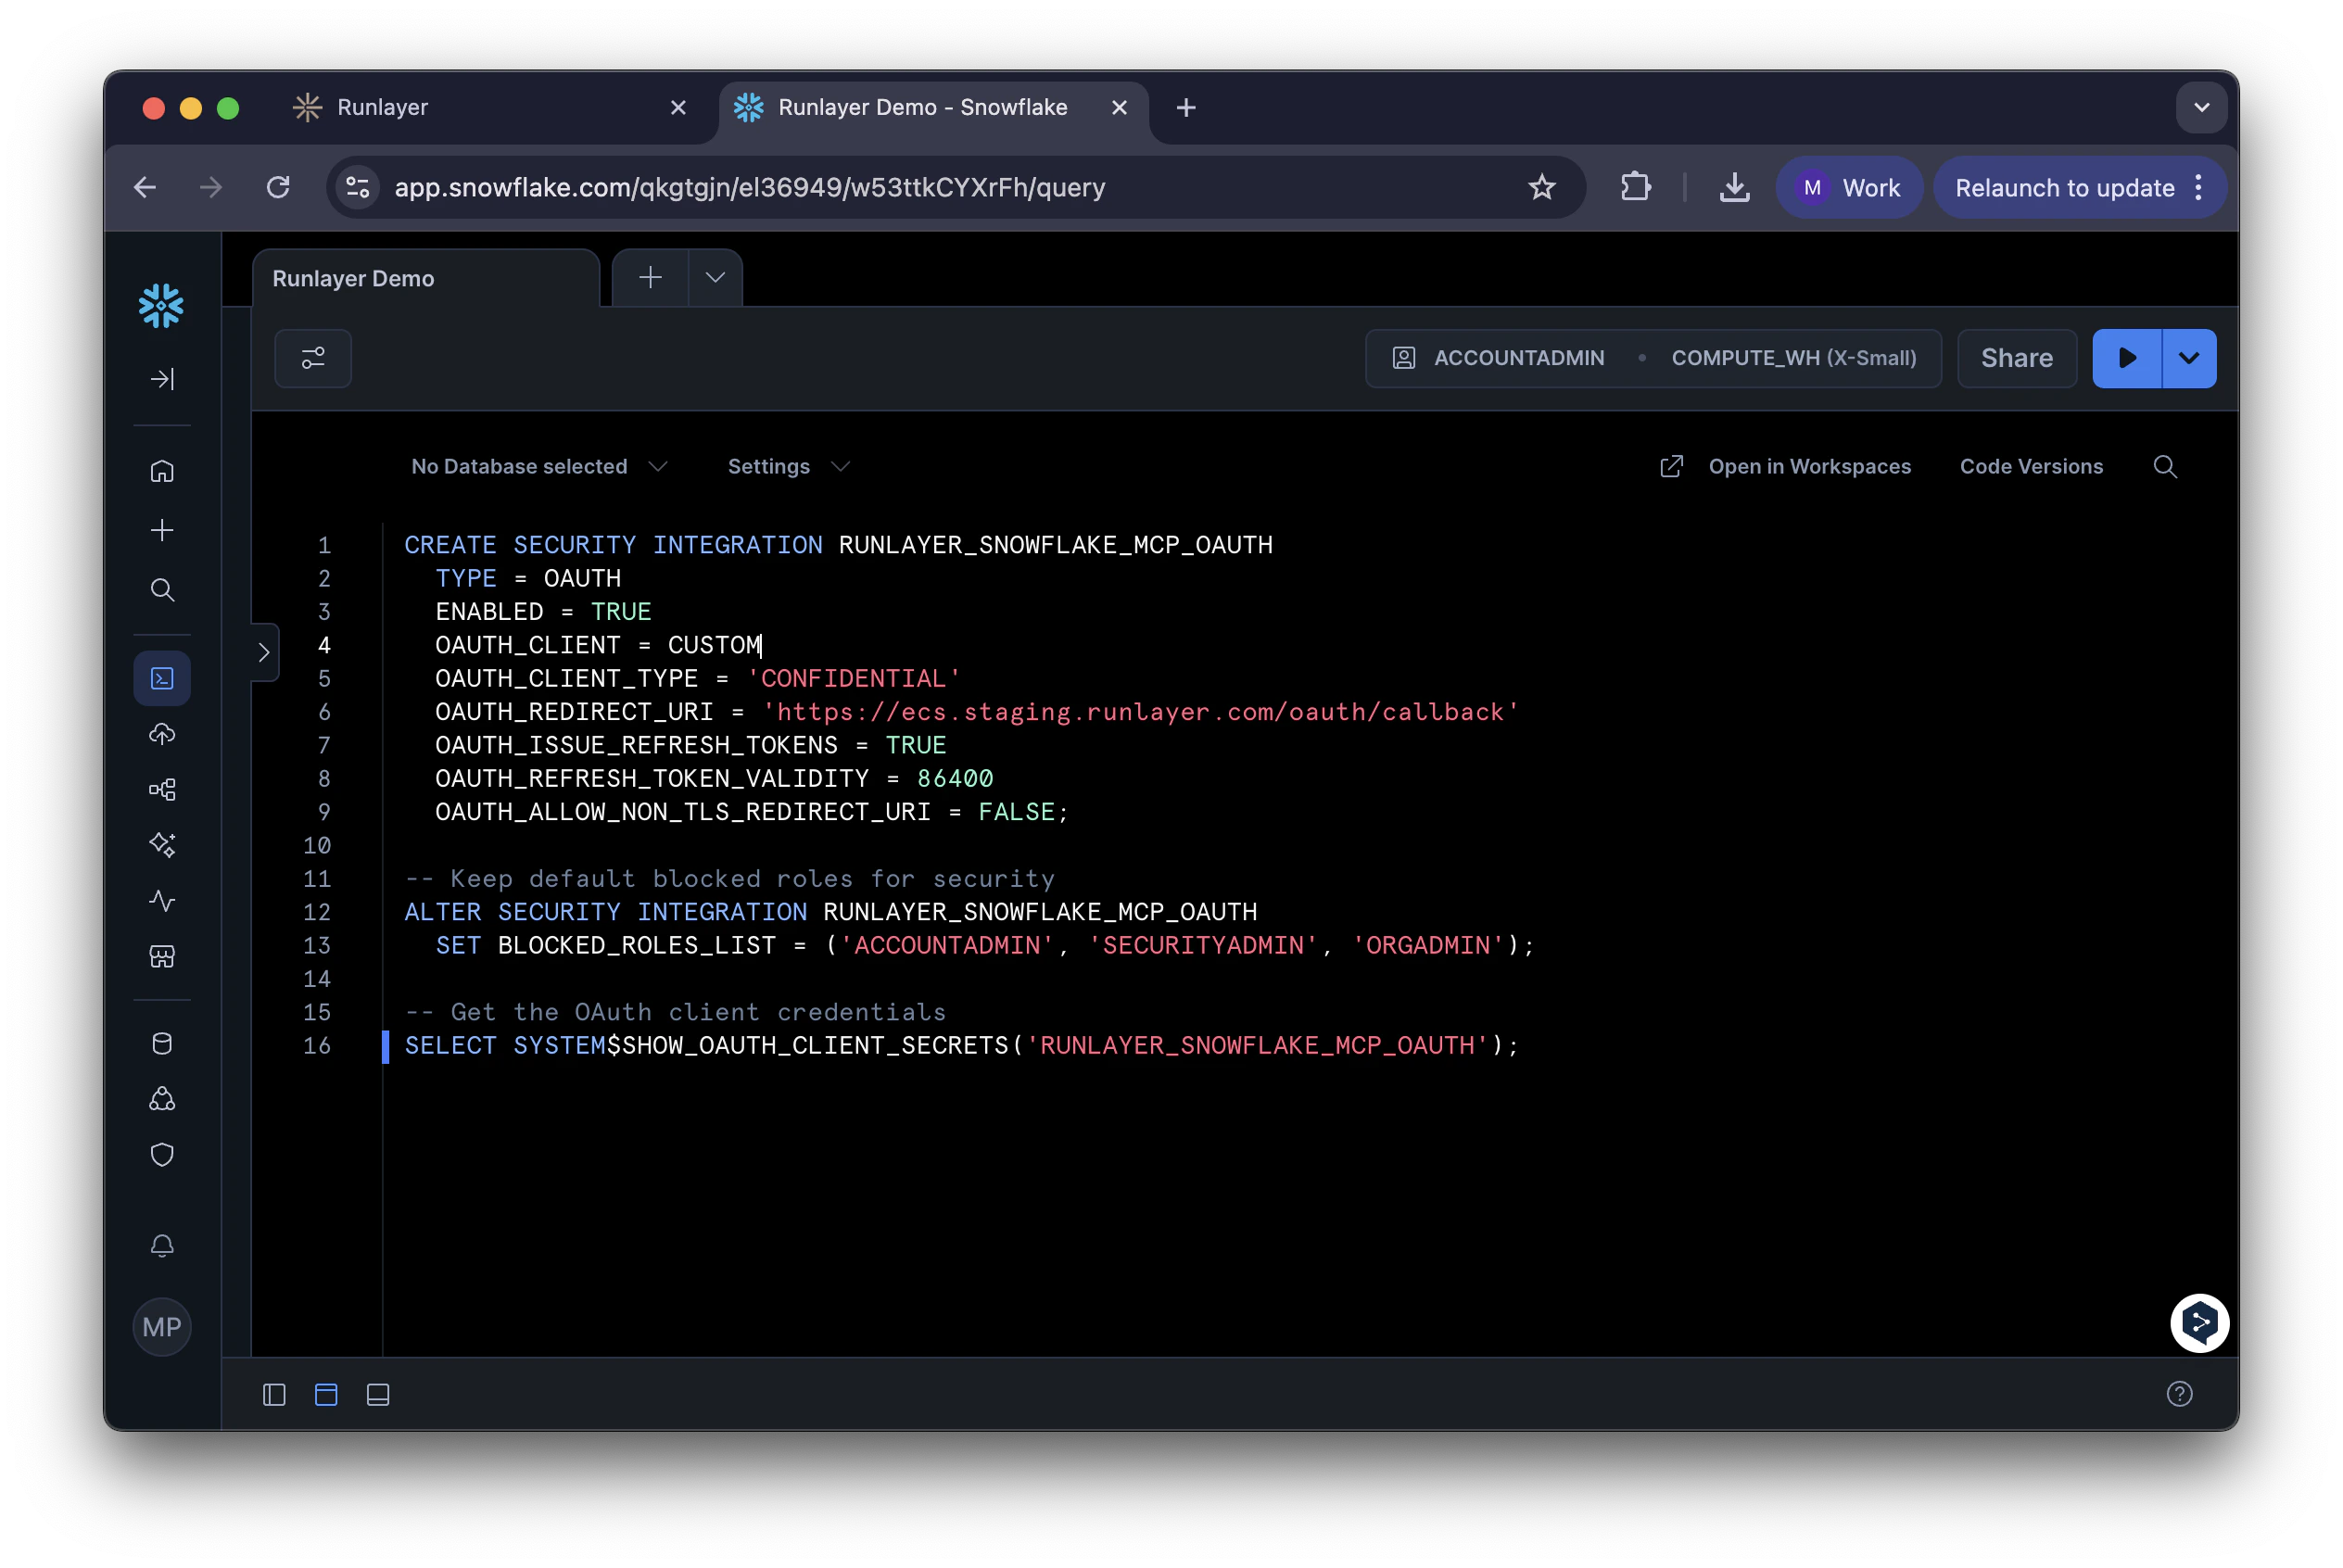
<your-tenant> with your Runlayer subdomain:Get OAuth Credentials
Run this SQL to get your credentials:Copy the 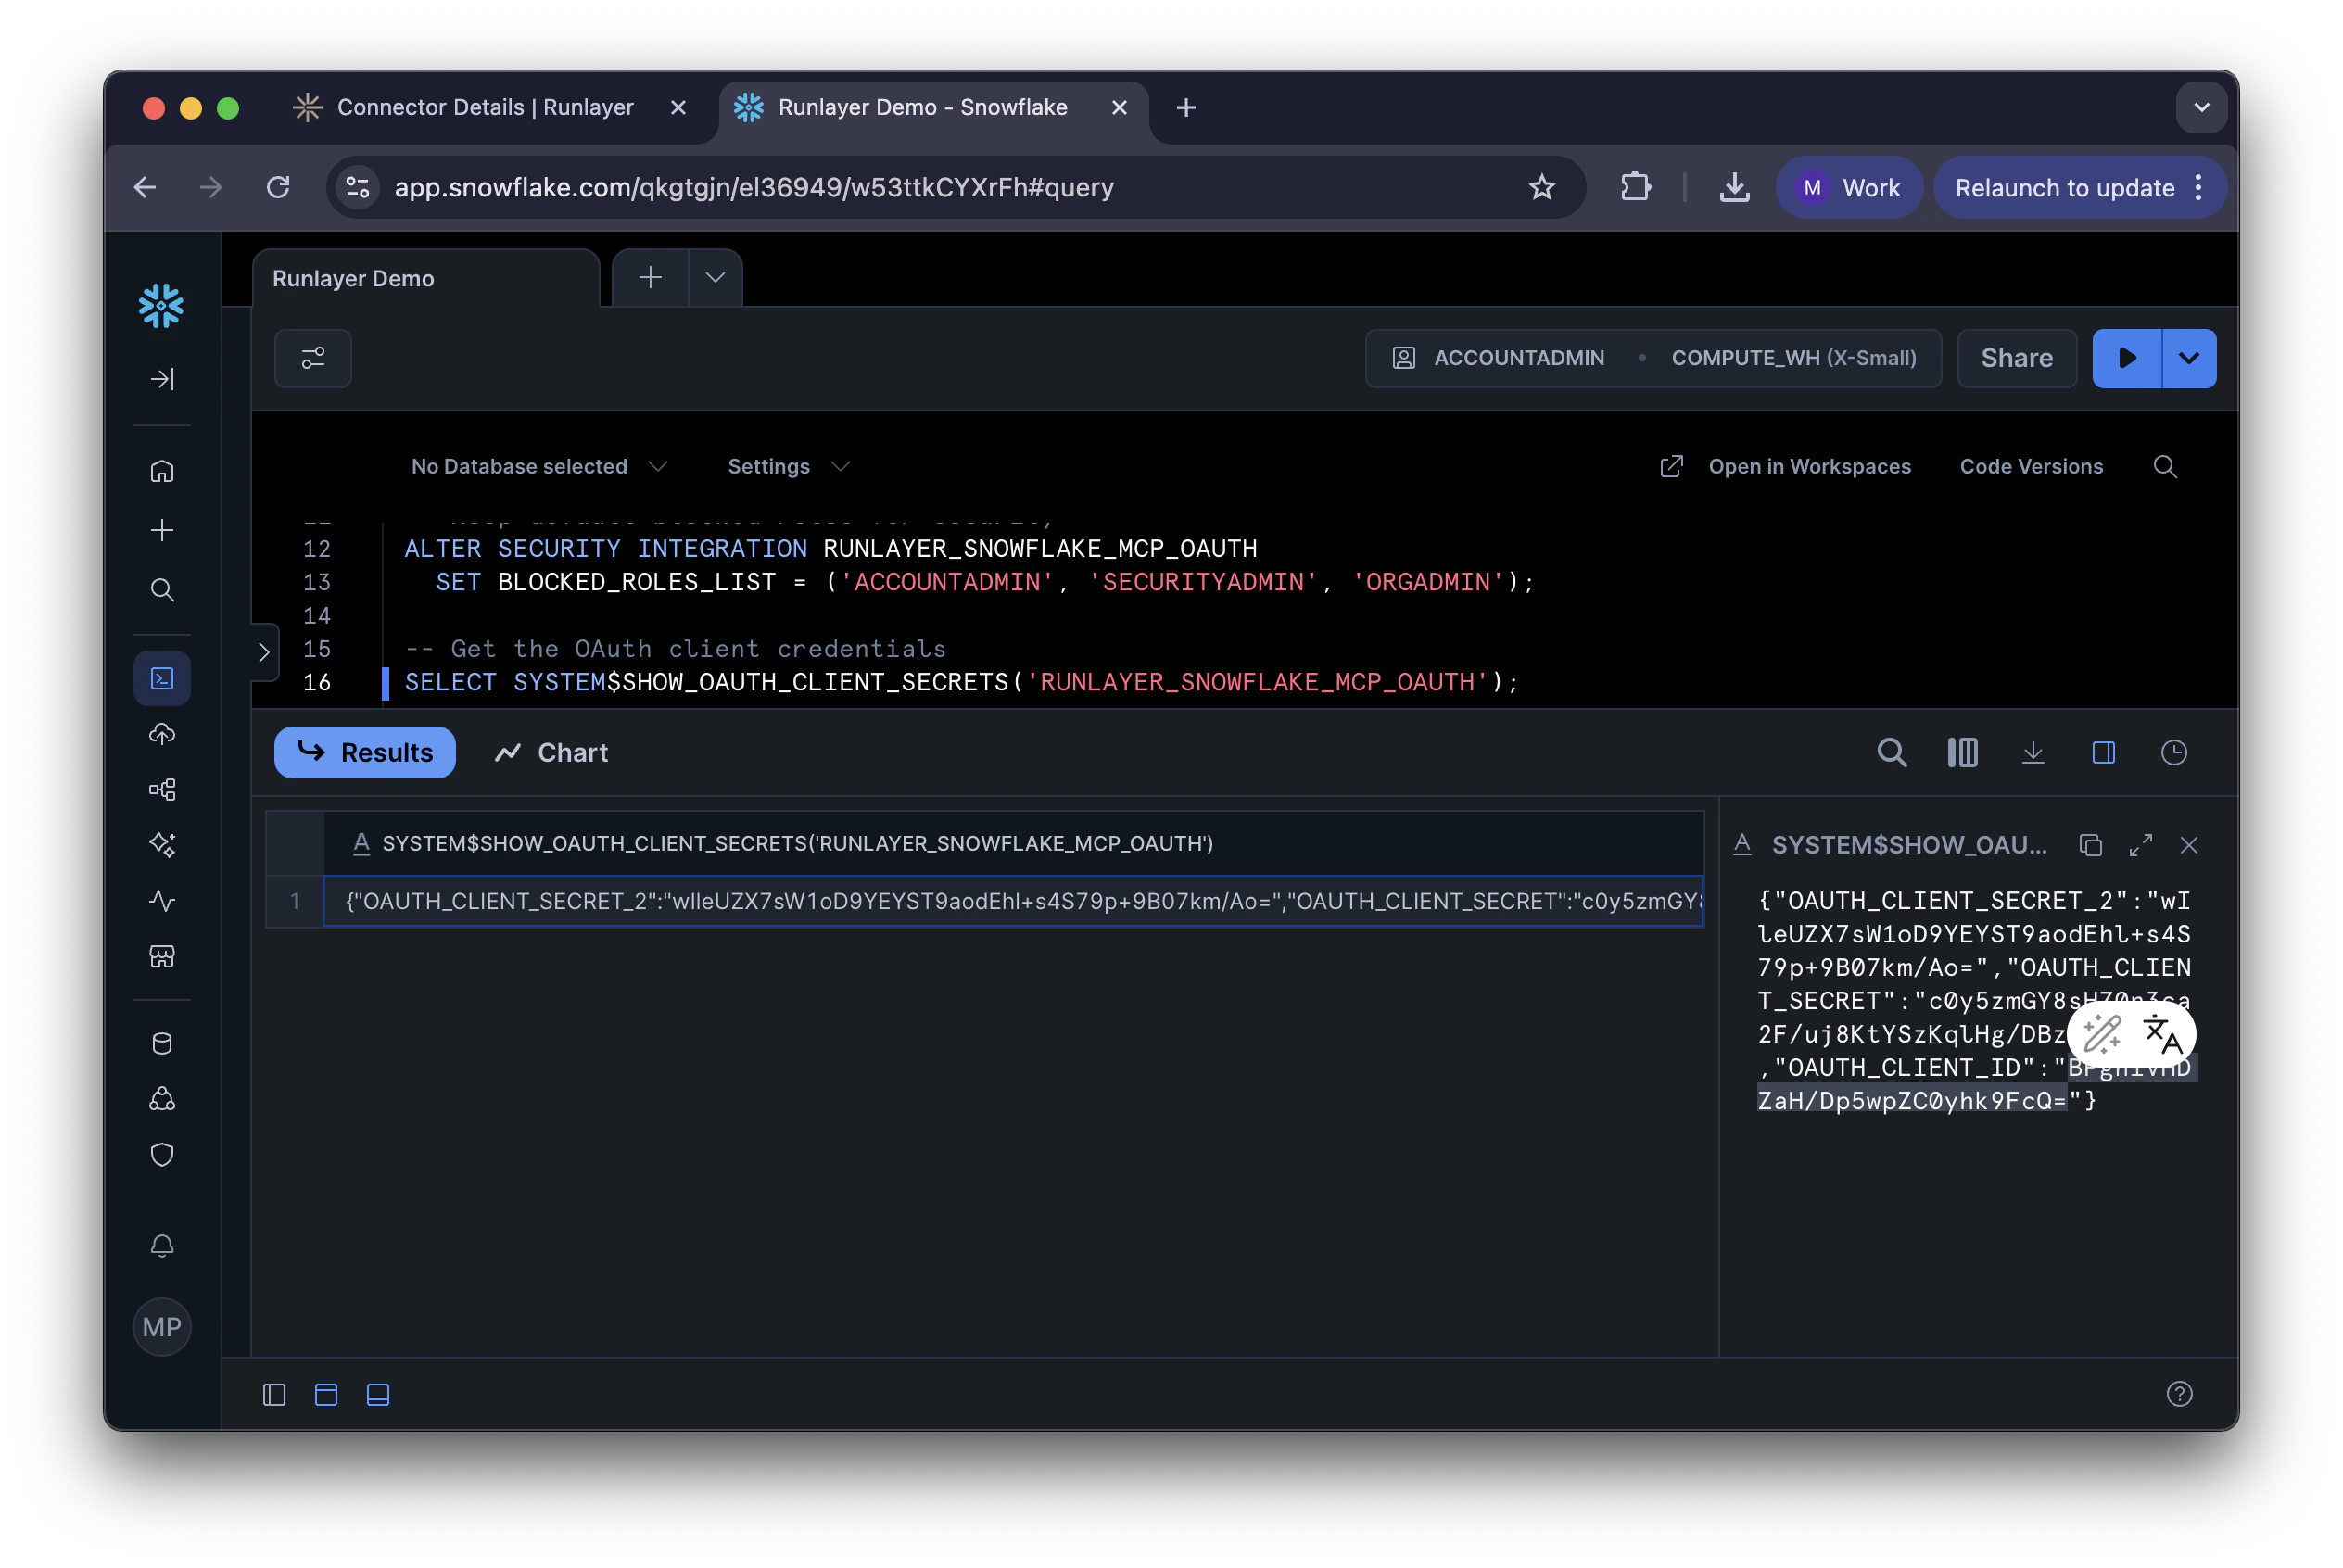
OAUTH_CLIENT_ID and OAUTH_CLIENT_SECRET from the result.Add Server in Runlayer
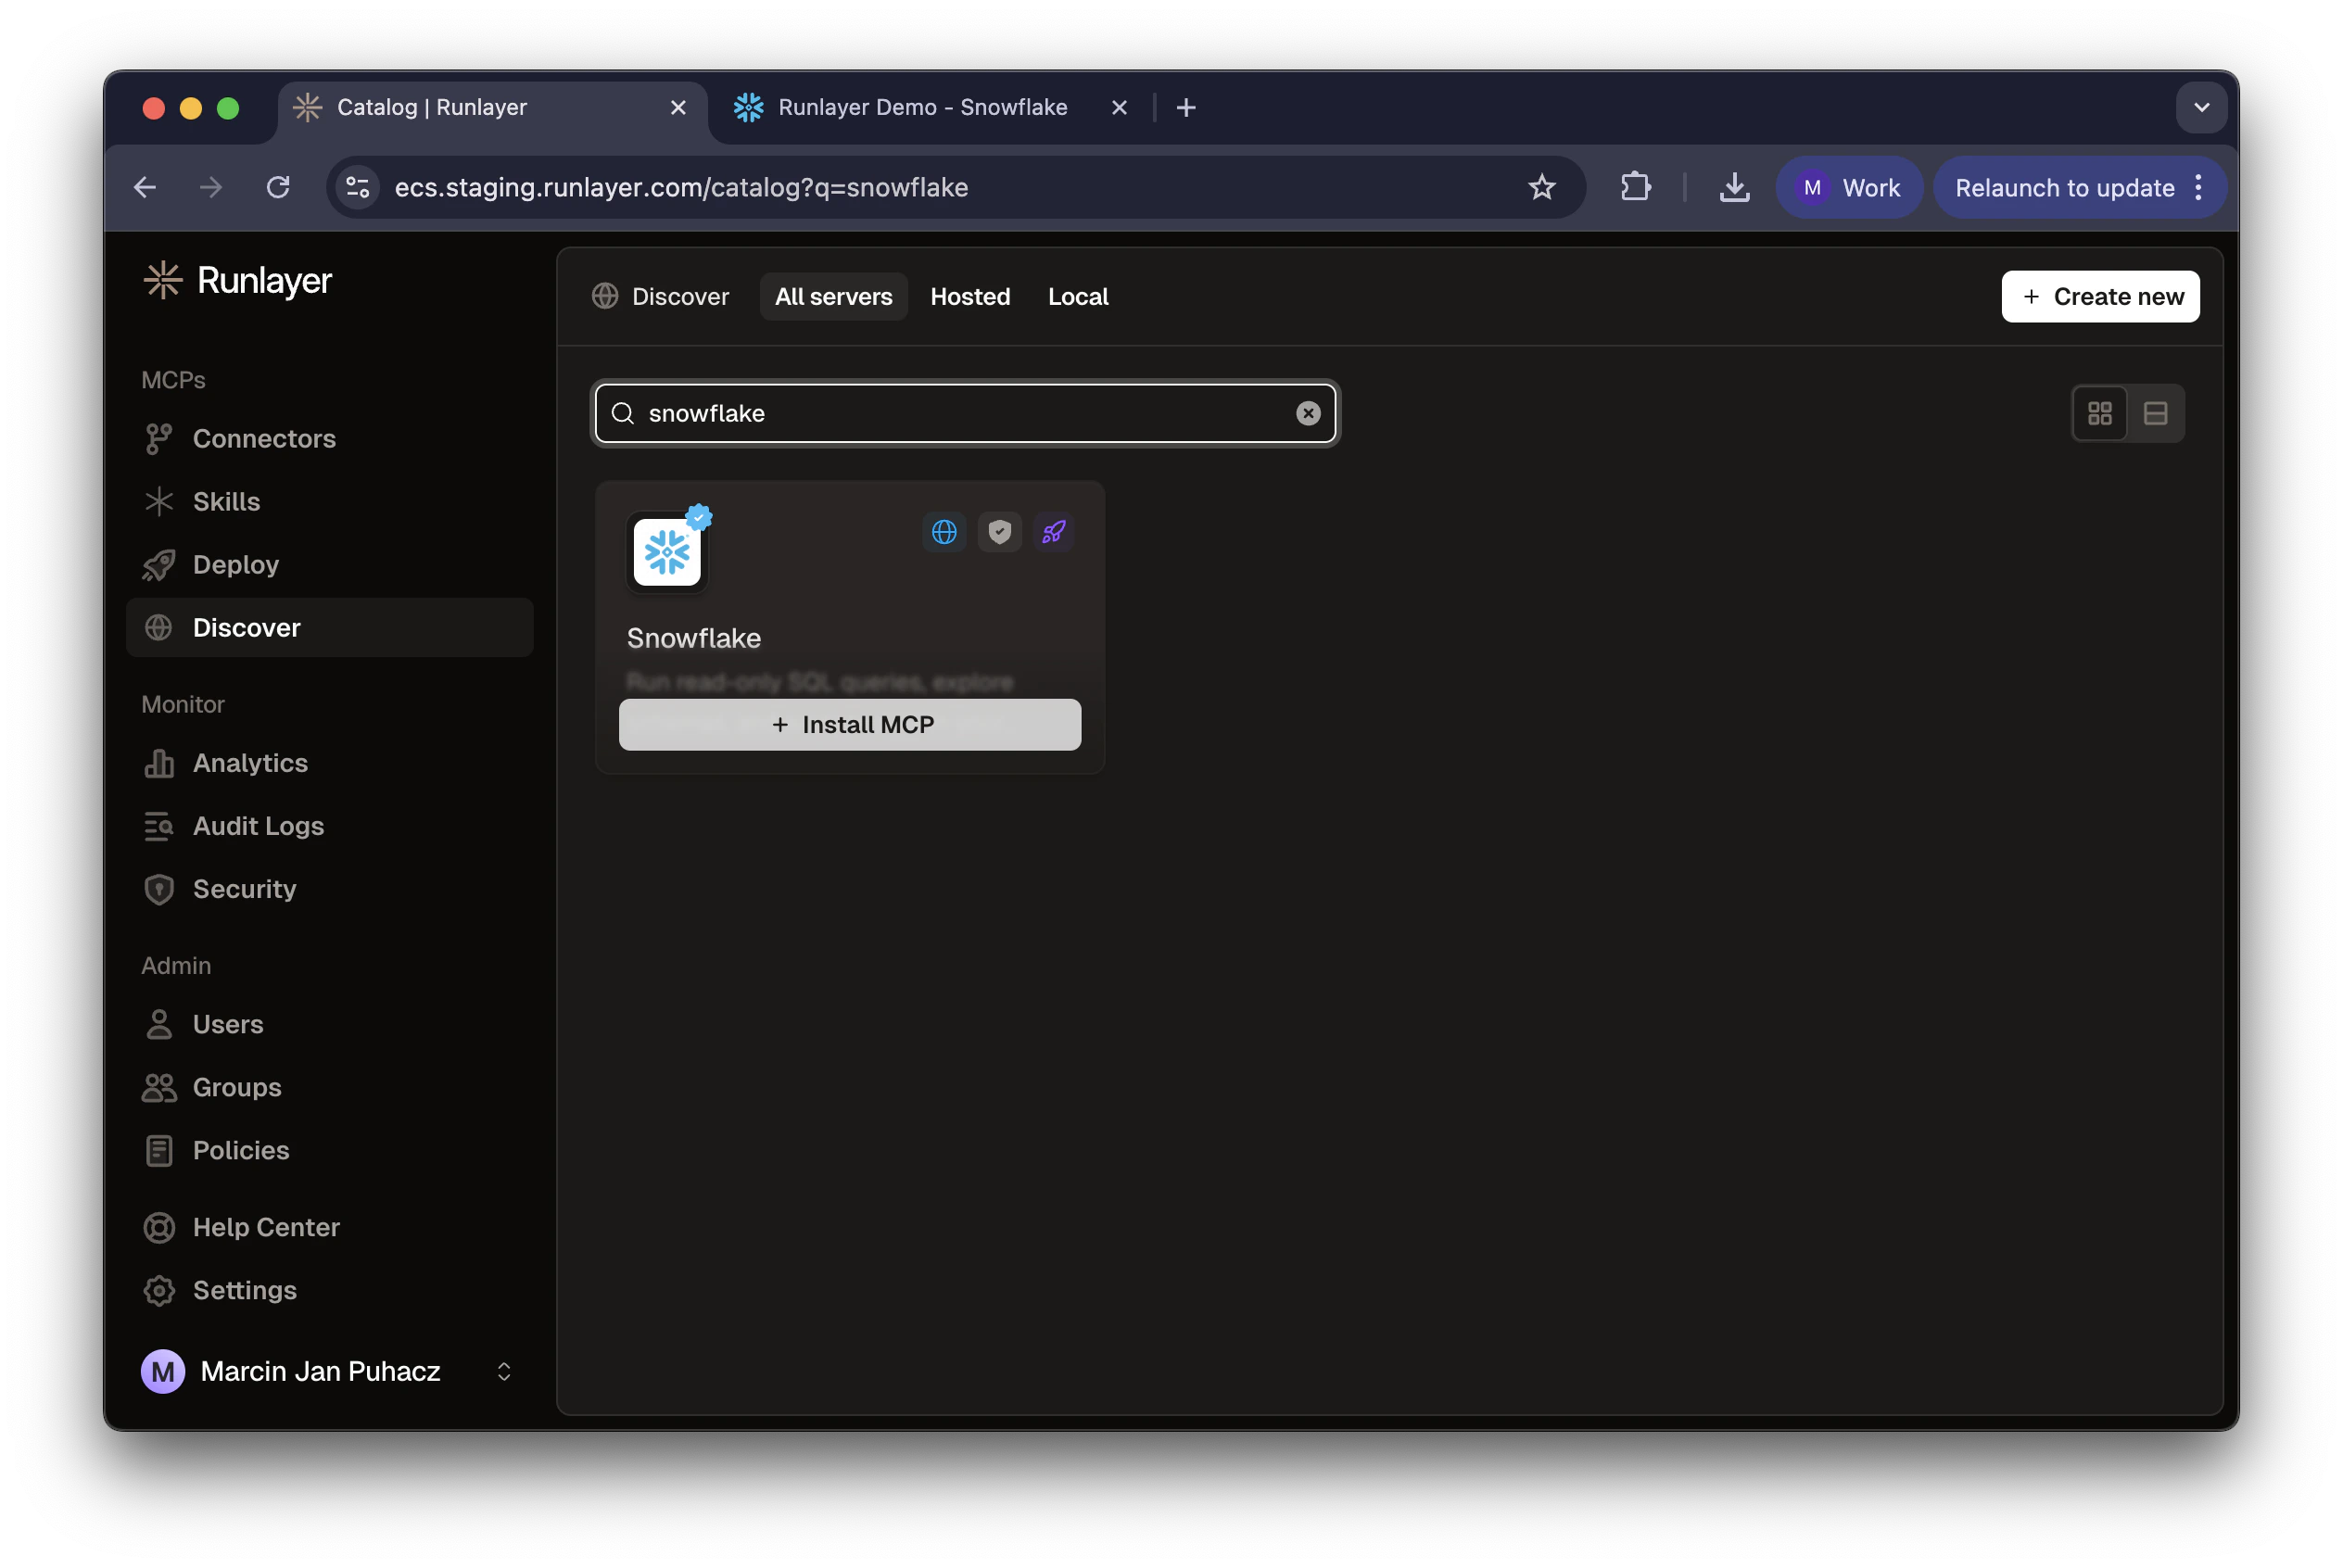
- In Runlayer, go to My connectors, find Snowflake, and click Add connector
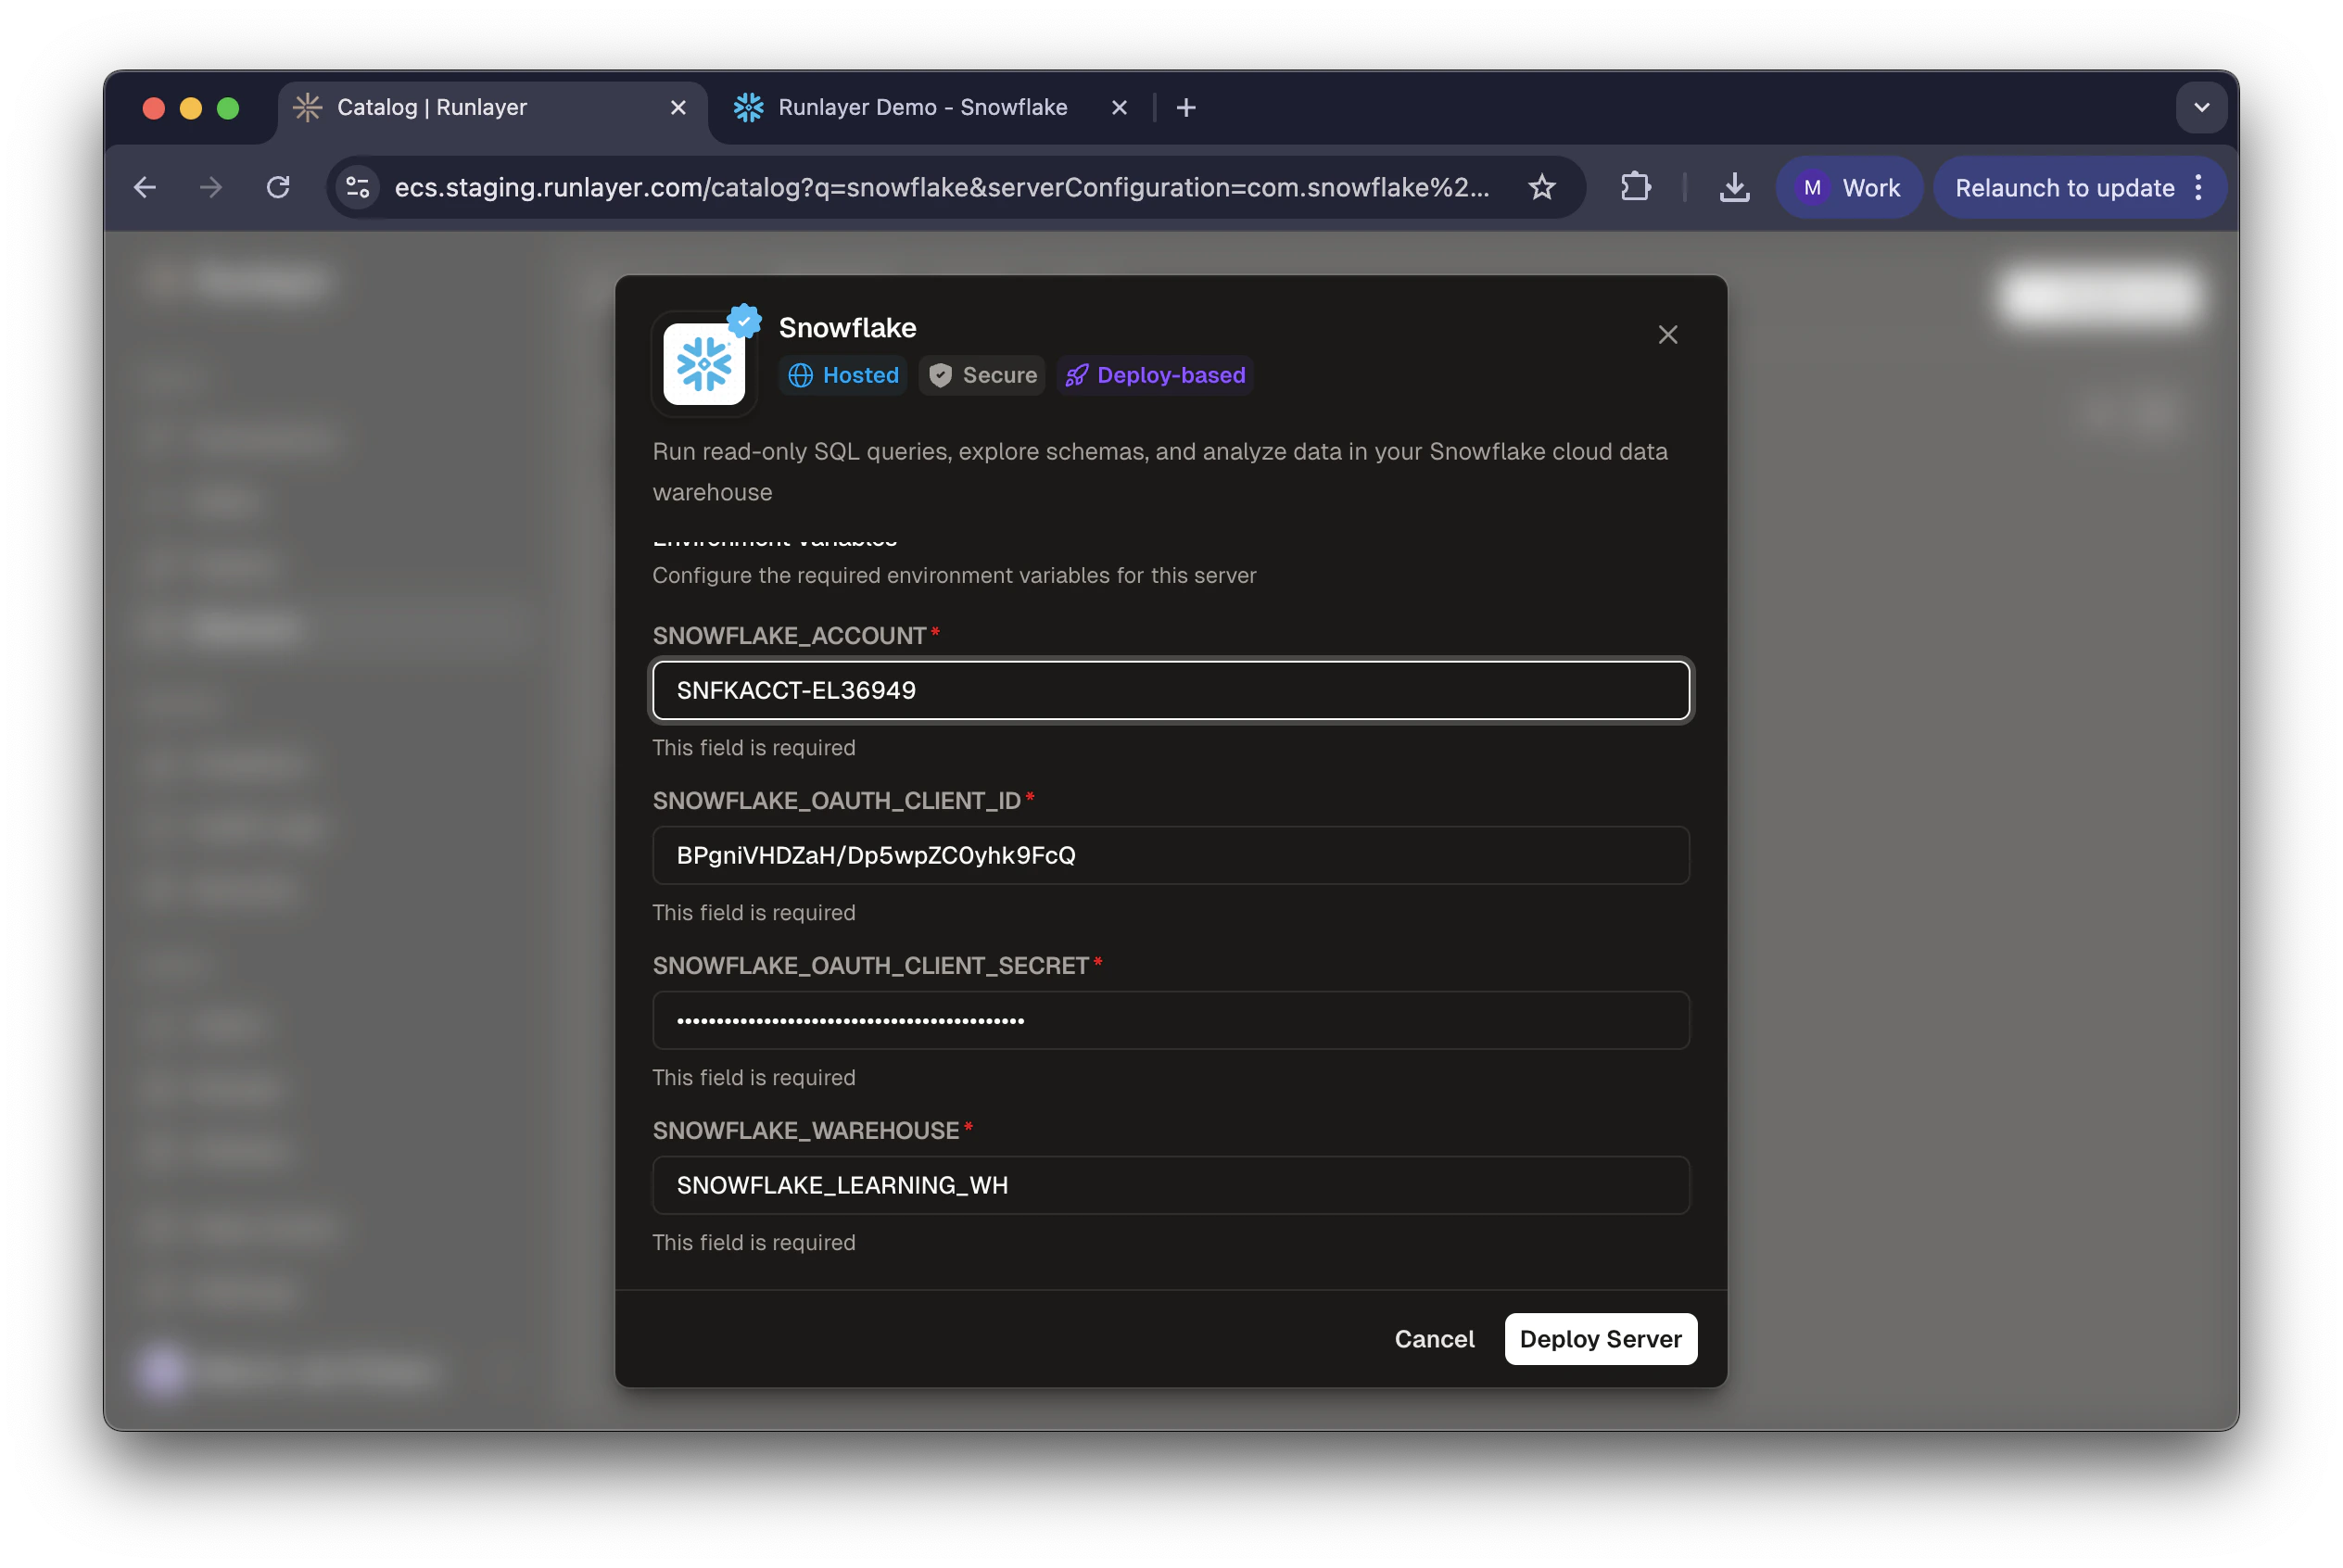
- Enter:
- SNOWFLAKE_ACCOUNT: Your account identifier (e.g.,
SNFKACCT-EL36949) - SNOWFLAKE_HOST: Your Snowflake host (e.g.,
snfkacct-el36949.snowflakecomputing.com) - SNOWFLAKE_OAUTH_CLIENT_ID: Client ID from Step 2
- SNOWFLAKE_OAUTH_CLIENT_SECRET: Client Secret from Step 2
- SNOWFLAKE_WAREHOUSE: Default warehouse (e.g.,
COMPUTE_WH)
- SNOWFLAKE_ACCOUNT: Your account identifier (e.g.,
- Click Deploy Server
Authorize
- Click Connect on the server page
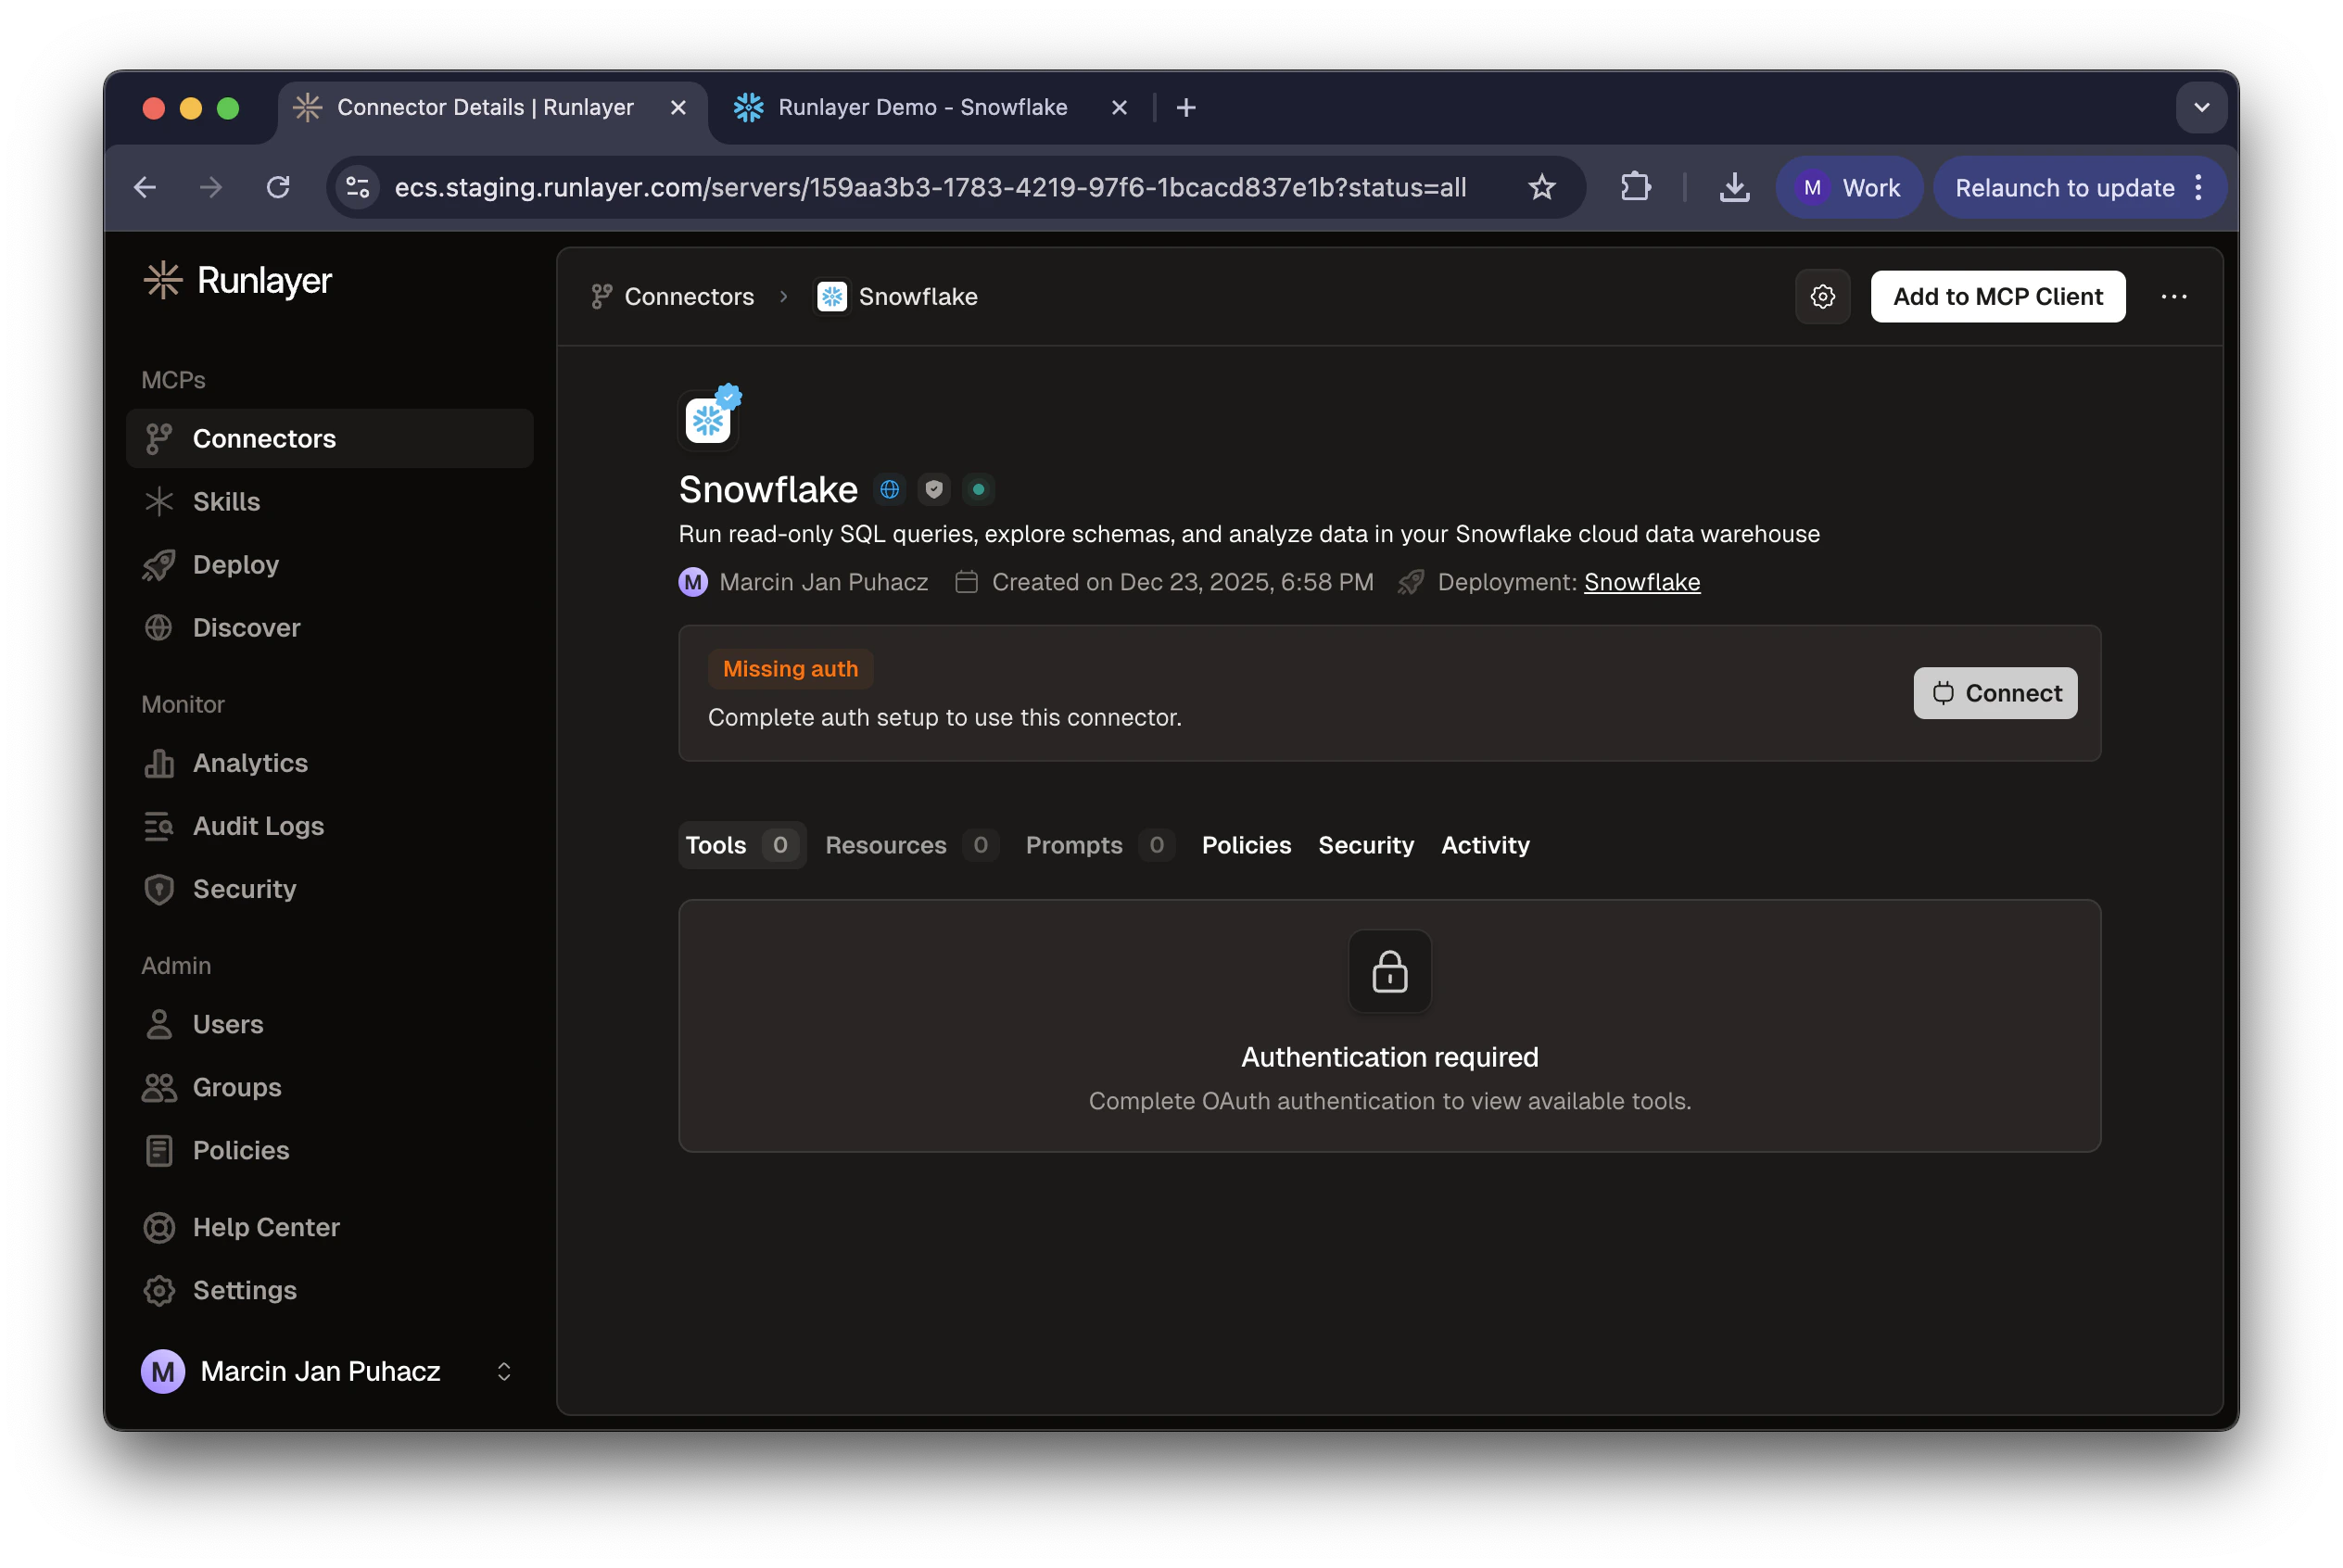
- Log in with your Snowflake credentials

- Review permissions and click Allow
Each user will need to complete this authorization process with their own Snowflake credentials. This ensures that queries run with each user’s individual permissions.
Configuration Reference
Required:| Variable | Description |
|---|---|
SNOWFLAKE_ACCOUNT | Account identifier (e.g., SNFKACCT-EL3694 or myorg-account_xyz) |
SNOWFLAKE_HOST | Snowflake host (e.g., myorg-account_xyz.snowflakecomputing.com) |
SNOWFLAKE_OAUTH_CLIENT_ID | OAuth client ID from security integration |
SNOWFLAKE_OAUTH_CLIENT_SECRET | OAuth client secret from security integration |
SNOWFLAKE_WAREHOUSE | Default warehouse for queries |
| Variable | Description |
|---|---|
SNOWFLAKE_ROLE | Default role for OAuth scopes (defaults to PUBLIC) |
Account vs Host
- SNOWFLAKE_ACCOUNT: Account identifier, required for OAuth URL construction (e.g.,
SNFKACCT-EL3694) - SNOWFLAKE_HOST: Snowflake hostname — use default (
{account}.snowflakecomputing.com) or custom for proxy/private endpoints
Updating Configuration
After initial deployment, you can update configuration options via CLI:Troubleshooting
Invalid account identifier
Invalid account identifier
Check your Snowflake URL for the correct format. For regional accounts, include the region (e.g.,
abc12345.us-east-1).Redirect URI mismatch
Redirect URI mismatch
Verify the
OAUTH_REDIRECT_URI in your security integration matches exactly: https://<your-tenant>.runlayer.com/oauth/callback (no trailing slash).Warehouse not found
Warehouse not found
Ensure the role you authorized has
USAGE privilege on the warehouse: GRANT USAGE ON WAREHOUSE <name> TO ROLE <role>;Blocked role error
Blocked role error
Remove the role from
BLOCKED_ROLES_LIST or choose a different role during authorization.